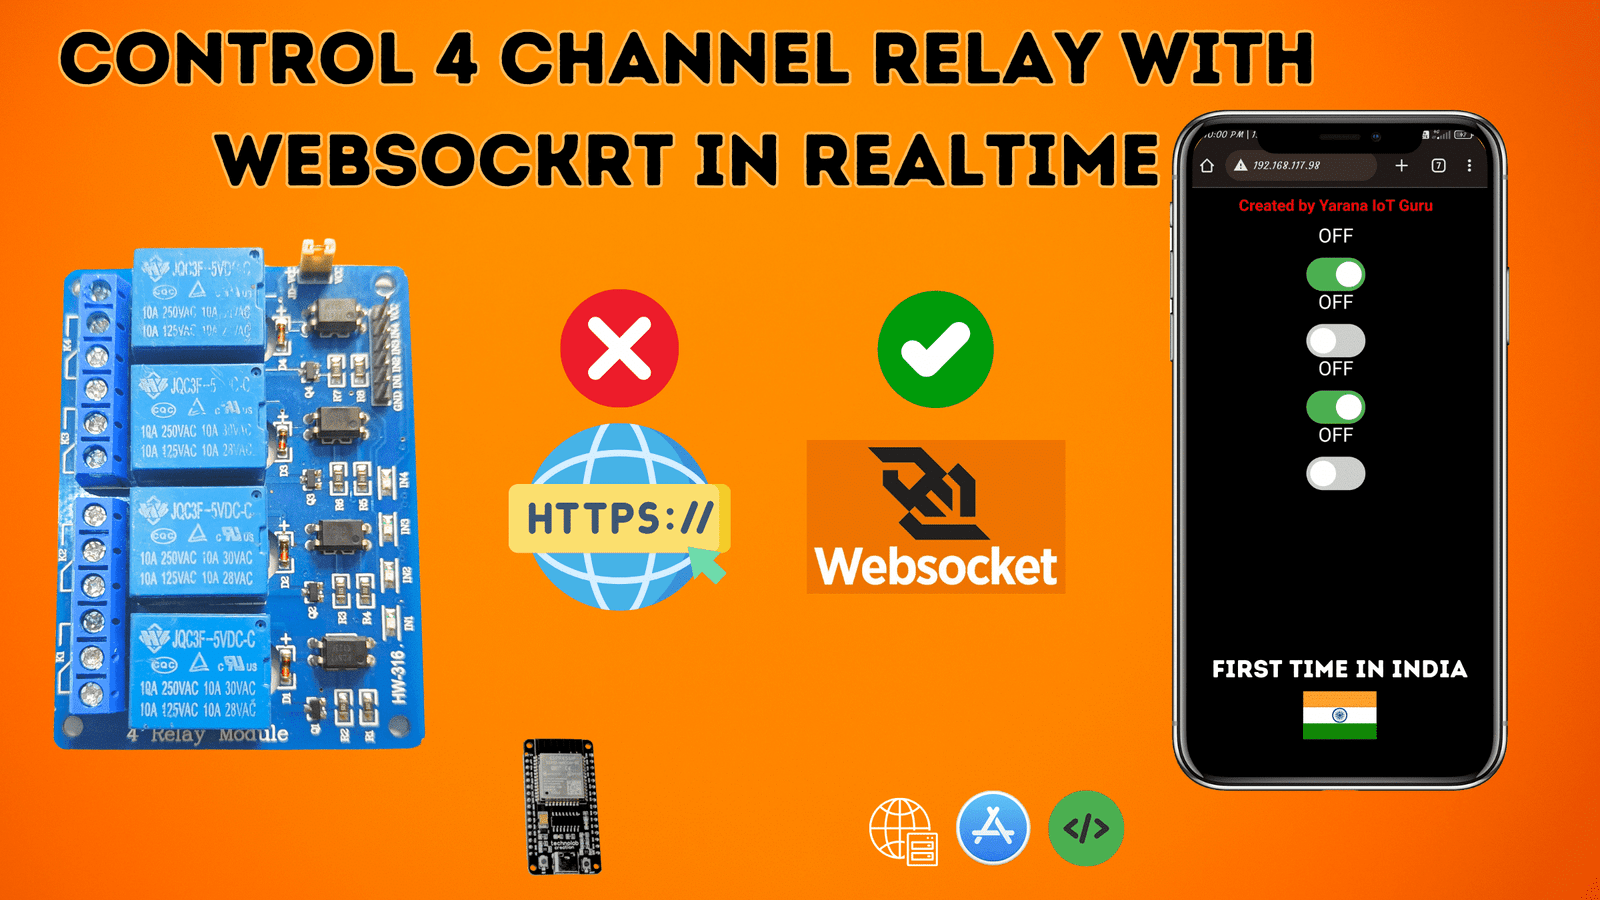
Create a Smart Home with ESP32 and WebSockets
September 12th, 2024
00:00

00:00
Summary
- Introduction to home automation using ESP32
- Build a 4-channel relay web server
- Gather necessary components and set up workspace
- Connect hardware and install libraries
- Upload code and configure Wi-Fi
- Control appliances via web interface
Sources
Welcome to Yarana IoT Guru! In this episode, the fascinating world of home automation using the ESP32 microcontroller will be explored. By the end of this guide, the listener will be able to create a sophisticated 4-channel relay web server with WebSocket integration, allowing effortless control and monitoring of home appliances. The ESP32 microcontroller is at the heart of this project. It is a powerful, low-cost microcontroller with integrated Wi-Fi and Bluetooth capabilities, making it an ideal choice for home automation. The project will utilize a 4-channel relay module to control multiple appliances, with each relay acting as a switch that can be turned on or off remotely through a web interface. The journey begins with gathering the necessary components. Essential items include the ESP32 microcontroller, a 4-channel relay module, a power supply, jumper wires, a breadboard (optional), and a USB cable for programming. Ensuring all components are within reach and the workspace is well-lit and clutter-free is crucial for a smooth setup. Next, the hardware connections are made. The ESP32 microcontroller is connected to the computer using the USB cable. The 4-channel relay module is then wired to the ESP32, following the pinout diagram or the manufacturer’s instructions. It is important to double-check all connections to ensure they are secure and correct. The Arduino IDE software, which is used for programming the ESP32, needs to be prepared. Required libraries for ESP32, WebSocket, and AsyncWebServer must be installed. Verification of the libraries’ installation is done through the Library Manager in the Arduino IDE. After the hardware setup and software preparation, the provided Arduino sketch is copied into the Arduino IDE. Wi-Fi credentials are updated in the code to match the network. The ESP32 board is connected to the computer, and the correct board and port are selected in the Arduino IDE. The code is then uploaded to the ESP32 board. Once the code is successfully uploaded, the ESP32 is disconnected from the computer and powered using an external power supply. The computer or smartphone is connected to the same Wi-Fi network as the ESP32. By opening a web browser and entering the IP address of the ESP32, the web interface is accessed. The web interface displays toggle buttons for each relay. Clicking on these buttons toggles the relays on and off, and real-time status updates are observed. Functionality is tested by connecting appliances to the relay module and verifying their response to the commands. This project provides a glimpse into the potential of smart home automation. The convenience of controlling home appliances with just a few clicks showcases the future of home living. Further customization options can be explored, such as adding additional features or integrating with other smart devices, continuing the innovation journey with Yarana IoT Guru. The first step in building an ESP32-based smart home system involves gathering all necessary components. This includes the ESP32 microcontroller, a 4-channel relay module, a power supply, jumper wires, and a USB cable for programming. Each of these components plays a crucial role in the projects success. Setting up the workspace is the next step. Its important to ensure the workspace is well-lit and clutter-free to avoid any mishaps during the assembly process. Having all components and tools within reach will streamline the setup. Additionally, preparing the computer with the Arduino IDE software is essential for programming the ESP32 microcontroller. Connecting the hardware comes next. The ESP32 microcontroller is connected to the computer using the USB cable. The 4-channel relay module is then wired to the ESP32 microcontroller. Following the pinout diagram or the manufacturer’s instructions is critical for accurate connections. Double-checking all connections ensures they are secure and correct, which is vital for the systems functionality. Once the hardware is connected, installing the required libraries in the Arduino IDE is the following step. Opening the Arduino IDE on the computer, the necessary libraries for ESP32, WebSocket, and AsyncWebServer are installed. Verifying these installations through the Library Manager ensures that everything is correctly set up. The provided Arduino sketch is then copied into the Arduino IDE. The Wi-Fi credentials in the code are updated to match the network. The ESP32 board is connected to the computer, and the correct board and port are selected in the Arduino IDE. Uploading the code to the ESP32 board is a crucial step in bringing the system to life. After the code is successfully uploaded, the ESP32 is disconnected from the computer and powered using an external power supply. The computer or smartphone is connected to the same Wi-Fi network as the ESP32. Accessing the web interface is done by opening a web browser and entering the IP address of the ESP32, which is displayed in the Serial Monitor. The web interface shows toggle buttons for each relay. Clicking on these buttons toggles the relays on and off, with real-time status updates visible on the interface. To test functionality, appliances are connected to the relay module. Verifying that they respond correctly to the commands ensures the system is working as intended. This process creates a sophisticated home automation system using the ESP32 microcontroller, providing the convenience and efficiency of smart home automation. By following these steps, a fully functional 4-channel relay web server with WebSocket integration is achieved, paving the way for further innovations in home automation technology with Yarana IoT Guru.